Forget label buffers! Better maps with selective label masks in QGIS
Cartographers use all kind of tricks to make their maps look deceptively simple. Yet, anyone who has ever tried to reproduce a cartographer’s design using only automatic GIS styling and labeling knows that the devil is in the details.
This post was motivated by Mika Hall’s retro map style.

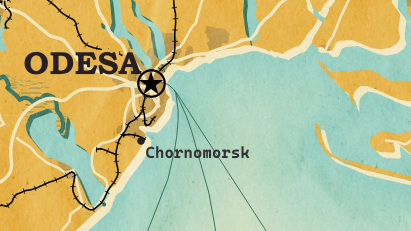
There are a lot of things going on in this design but I want to draw your attention to the labels – and particularly their background:

This kind of effect cannot be achieved by good old label buffers because no matter which color we choose for the buffer, there will always be cases when the chosen color is not ideal, for example, when some labels are on land and some over water:

Label masks to the rescue!

Here’s how it’s done:
Selective masking has actually been around since QGIS 3.12. There are two things we need to take care of when setting up label masks:
1. First we need to enable masks in the label settings for all labels we want to mask (for example the city labels). The mask tab is conveniently located right next to the label buffer tab:

2. Then we can go to the layers we want to apply the masks to (for example the railroads layer). Here we can configure which symbol layers should be affected by which mask:

Note: The order of steps is important here since the “Mask sources” list will be empty as long as we don’t have any label masks enabled and there is currently no help text explaining this fact.
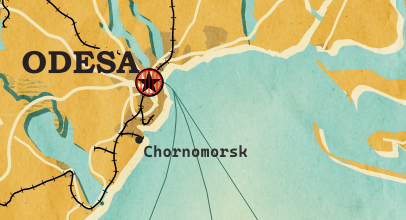
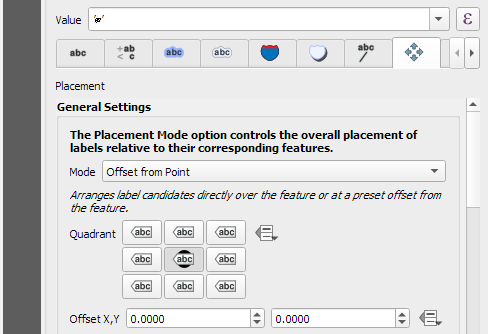
I’m also using label masks to keep the inside of the large city markers (the ones with a star inside a circle) clear of visual clutter. In short, I’m putting a circle-shaped character, such as ◍, over the city location:


Once we are happy with the size and placement of this label, we can then reduce the label’s opacity to 0, enable masks, and configure the railroads layer to use this mask.
As a general rule of thumb, it makes sense to apply the masks to dark background features such as the railways, rivers, and lake outlines in our map design:

If you have never used label masks before, I strongly encourage you to give them a try next time you work on a map for public consumption because they provide this little extra touch that is often missing from GIS maps.
Happy QGISing! Make maps not war.
Hi, I’m trying the set label masks for heights on a contour line layer. It works like a charm manually set. I saved the style in a qml-file. In a python script I open/add this style, but the mask settings (layer and source) is missing. I would like to add the mask with pyQGIS. In step 2) What would be the pyQGIS code to get the name (id) of the “Masked symbol layers” and the “Mask sources”?
Hi B.P. That sounds like to discovered a bug / missing PyQGIS API bindings. Did you already look into the PyQGIS API docs? They are automatically generated. So if it isn’t there, we’ll need to file a bug report and wait for the missing functionality to be added.
Thanks for coming back to me. I also asked at https://gis.stackexchange.com/questions/447362/pyqgis-to-set-masked-symbol-layer-and-mask-source and got an answer for a workaround for the lack of missing masking layer in the QML-file.